Yugabyte Psycopg2 smart driver is a Python driver for [YSQL](../../../../api/ysql/) built on the [PostgreSQL psycopg2 driver](https://github.com/psycopg/psycopg2), with additional connection load balancing features.
For more information on the YugabyteDB psycopg2 smart driver, see the following:
- [YugabyteDB smart drivers for YSQL](../../smart-drivers/)
- [CRUD operations](../yugabyte-psycopg2/)
- [GitHub repository](https://github.com/yugabyte/psycopg2)
- [Smart Driver architecture](https://github.com/yugabyte/yugabyte-db/blob/master/architecture/design/smart-driver.md)
## Download the driver dependency
Building Psycopg2 requires a few prerequisites (a C compiler and some development packages). Check the [installation instructions](https://www.psycopg.org/docs/install.html#build-prerequisites) and [the FAQ](https://www.psycopg.org/docs/faq.html#faq-compile) for details.
The YugabyteDB Psycopg2 driver requires PostgreSQL version 12 or later (preferably 14).
If prerequisites are met, you can install psycopg2-yugabytedb like any other Python package, using pip to download it from [PyPI](https://pypi.org/project/psycopg2-yugabytedb/):
```sh
$ pip install psycopg2-yugabytedb
```
Or, you can use the setup.py script if you've downloaded the source package locally:
```sh
$ python setup.py build
$ sudo python setup.py install
```
## Fundamentals
Learn how to perform common tasks required for Python application development using the YugabyteDB Psycopg2 smart driver.
### Load balancing connection properties
The following connection properties need to be added to enable load balancing:
- `load_balance` - enable cluster-aware load balancing by setting this property to one of the [allowed values](../../smart-drivers/#node-type-aware-load-balancing) other than `false`; disabled by default.
- `topology_keys` - provide comma-separated geo-location values to enable topology-aware load balancing. Geo-locations can be provided as `cloud.region.zone`.
By default, the driver refreshes the list of nodes every 300 seconds (5 minutes). You can change this value by including the `yb_servers_refresh_interval` parameter.
For more information, see [Cluster-aware load balancing](../../smart-drivers/#cluster-aware-load-balancing).
### Use the driver
To use the driver, pass new connection properties for load balancing in the connection string or in the dictionary.
To enable uniform load balancing across all servers, you set the `load_balance` property to `true` or `any` in the connection string or dictionary, as per the following examples:
- Connection String
```python
conn = psycopg2.connect("dbname=database_name host=hostname port=5433 user=username password=password load_balance=true")
```
- Connection Dictionary
```python
conn = psycopg2.connect(user = 'username', password='password', host = 'hostname', port = '5433', dbname = 'database_name', load_balance='True')
```
You can specify [multiple hosts](../yugabyte-psycopg2/#use-multiple-addresses) in the connection string in case the primary address fails. After the driver establishes the initial connection, it fetches the list of available servers from the cluster, and load-balances subsequent connection requests across these servers.
To specify topology keys, you set the `topology_keys` property to comma-separated values in the Connection string or dictionary, as per the following examples:
- Connection String
```python
conn = psycopg2.connect("dbname=database_name host=hostname port=5433 user=username password=password load_balance=true topology_keys=cloud.region.zone1,cloud.region.zone2")
```
- Connection Dictionary
```python
conn = psycopg2.connect(user = 'username', password='password', host = 'hostname', port = '5433', dbname = 'database_name', load_balance='True', topology_keys='cloud.region.zone1,cloud.region.zone2')
```
To configure a SimpleConnectionPool, specify load balance as follows:
```python
yb_pool = psycopg2.pool.SimpleConnectionPool(1, 10, user="yugabyte",
password="yugabyte",
host="127.0.0.1",
port="5433",
database="yugabyte",
load_balance="True")
conn = yb_pool.getconn()
```
## Try it out
This tutorial shows how to use the Yugabyte Psycopg2 driver with YugabyteDB. It starts by creating a 3 node cluster with a replication factor of 3.
Next, you use a Python shell terminal to demonstrate the driver's load balancing features by running a few python scripts.
{{< note title="Note">}}
The driver requires YugabyteDB version 2.7.2.0 or later.
{{< /note>}}
### Create a local cluster
Create a universe with a 3-node RF-3 cluster with some fictitious geo-locations assigned. The placement values used are just tokens and have nothing to do with actual AWS cloud regions and zones.
```sh
cd
```
To create a multi-zone cluster, do the following:
1. Start the first node by running the yugabyted start command, passing in the `--cloud_location` and `--fault_tolerance` flags to set the node location details, as follows:
```sh
./bin/yugabyted start --advertise_address=127.0.0.1 \
--base_dir=$HOME/yugabyte-{{< yb-version version="stable" >}}/node1 \
--cloud_location=aws.us-east-1.us-east-1a \
--fault_tolerance=zone
```
1. Start the second and the third node on two separate VMs using the `--join` flag.
For the second node, use the IP address of the first node in the `--join` flag:
```sh
./bin/yugabyted start --advertise_address=127.0.0.2 \
--join=127.0.0.1 \
--base_dir=$HOME/yugabyte-{{< yb-version version="stable" >}}/node2 \
--cloud_location=aws.us-east-1.us-east-1a \
--fault_tolerance=zone
```
For the third node, you can use the IP address of any currently running node in the universe (for example, the first or the second node) in the `--join` flag:
```sh
./bin/yugabyted start --advertise_address=127.0.0.3 \
--join=127.0.0.1 \
--base_dir=$HOME/yugabyte-{{< yb-version version="stable" >}}/node3 \
--cloud_location=aws.us-east-1.us-east-1b \
--fault_tolerance=zone
```
### Check uniform load balancing
Log into your Python terminal and run the following script:
```python
import psycopg2
conns = []
for i in range(30):
conn = psycopg2.connect(user = 'username', password='xxx', host = 'hostname', port = '5433', dbname = 'database_name', load_balance='True')
conns.append(conn)
```
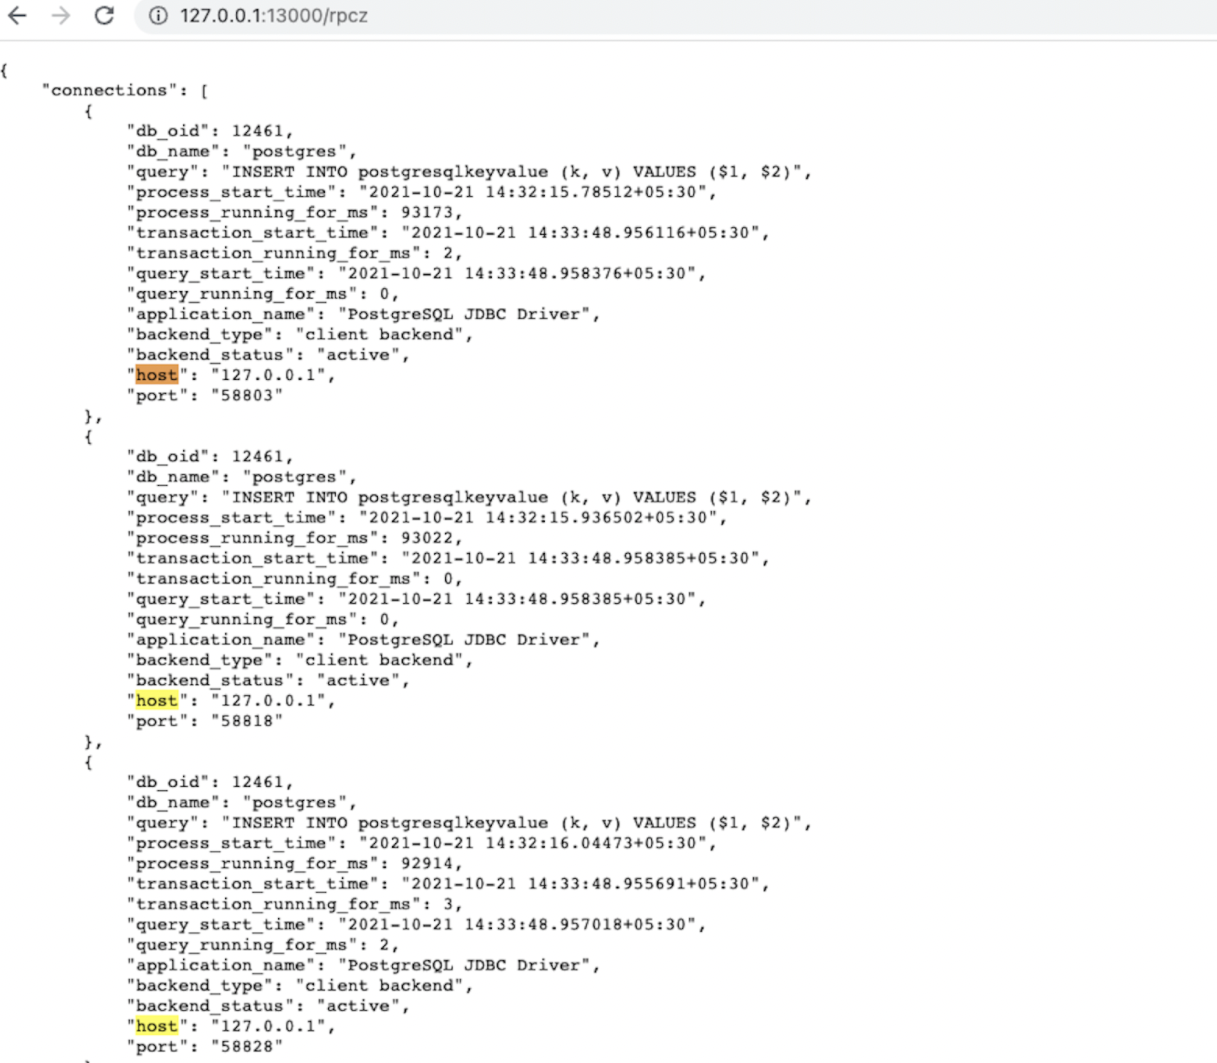
The application creates 30 connections. To verify the behavior, wait for the app to create connections and then visit `http://:13000/rpcz` from your browser for each node to see that the connections are equally distributed among the nodes. This URL presents a list of connections where each element of the list has some information about the connection as shown in the following screenshot. You can count the number of connections from that list, or search for the occurrence count of the `host` keyword on that webpage. Each node should have 10 connections.
You can also verify the number of connections by running the following script in the same terminal:
```python
from psycopg2.policies import ClusterAwareLoadBalancer as lb
obj = lb()
obj.printHostToConnMap()
```
This displays a key value pair map where the keys are the host and the values are the number of connections on them. (This is the client-side perspective of the number of connections.)
### Check topology-aware load balancing using yb-sample-apps
Run the following script in your new Python terminal with the `topology_keys` property set to `aws.us-east-1.us-east-1a`; only two nodes are used in this case.
```python
import psycopg2
conns = []
for i in range(30):
conn = psycopg2.connect(user = 'username', password='xxx', host = 'hostname', port = '5433', dbname = 'database_name', load_balance='True', topology_keys='aws.us-east-1.us-east-1a')
conns.append(conn)
```
To verify the behavior, wait for the app to create connections and then navigate to `http://:13000/rpcz`. The first two nodes should have 15 connections each, and the third node should have zero connections. You can also verify this by running the previous verify script in the same terminal.
### Clean up
When you're done experimenting, run the following command to destroy the local cluster:
```sh
./bin/yugabyted destroy --base_dir=$HOME/yugabyte-{{< yb-version version="stable" >}}/node1
./bin/yugabyted destroy --base_dir=$HOME/yugabyte-{{< yb-version version="stable" >}}/node2
./bin/yugabyted destroy --base_dir=$HOME/yugabyte-{{< yb-version version="stable" >}}/node3
```
## Limitations
Currently, [PostgreSQL psycopg2 driver](https://github.com/psycopg/psycopg2) and [Yugabyte Psycopg2 smart driver](https://github.com/yugabyte/psycopg2) _cannot_ be used in the same environment.