## Prerequisites
1. You need to have an IAM user who has `AWSCloudFormationFullAccess`, `AmazonEC2FullAccess` and `ssm:GetParameters` privilege.
2. If you are going to create the stack via AWS Console then make sure the user also has `s3:CreateBucket`, `s3:PutObject` and `s3:GetObject` policies.
3. Create an SSH key pair that you want to attach to the nodes.
4. In the region you want to bring up the stack, make sure you can launch new VPCs.
5. Download the template file.
```sh
$ wget https://raw.githubusercontent.com/yugabyte/aws-cloudformation/master/yugabyte_cloudformation.yaml
```
{{< note title="Note" >}}
When using an instance with local disks (as opposed to EBS), the `.yaml` file needs to be changed for YugabyteDB to recognize the local disks, as per [this example](https://github.com/yugabyte/aws-cloudformation/blob/master/yugabyte_ephemeral_nvme_cloudformation.yaml) that demonstrates the use of different instance types.
{{< /note >}}
## AWS Command Line
Create CloudFormation template:
```sh
$ aws cloudformation create-stack \
--stack-name \
--template-body file://yugabyte_cloudformation.yaml \
--parameters ParameterKey=DBVersion,ParameterValue=2.1.6.0-b17 ParameterKey=KeyName,ParameterValue= \
--region
```
Once resource creation completes, check that stack was created:
```sh
$ aws cloudformation describe-stacks \
--stack-name \
--region
```
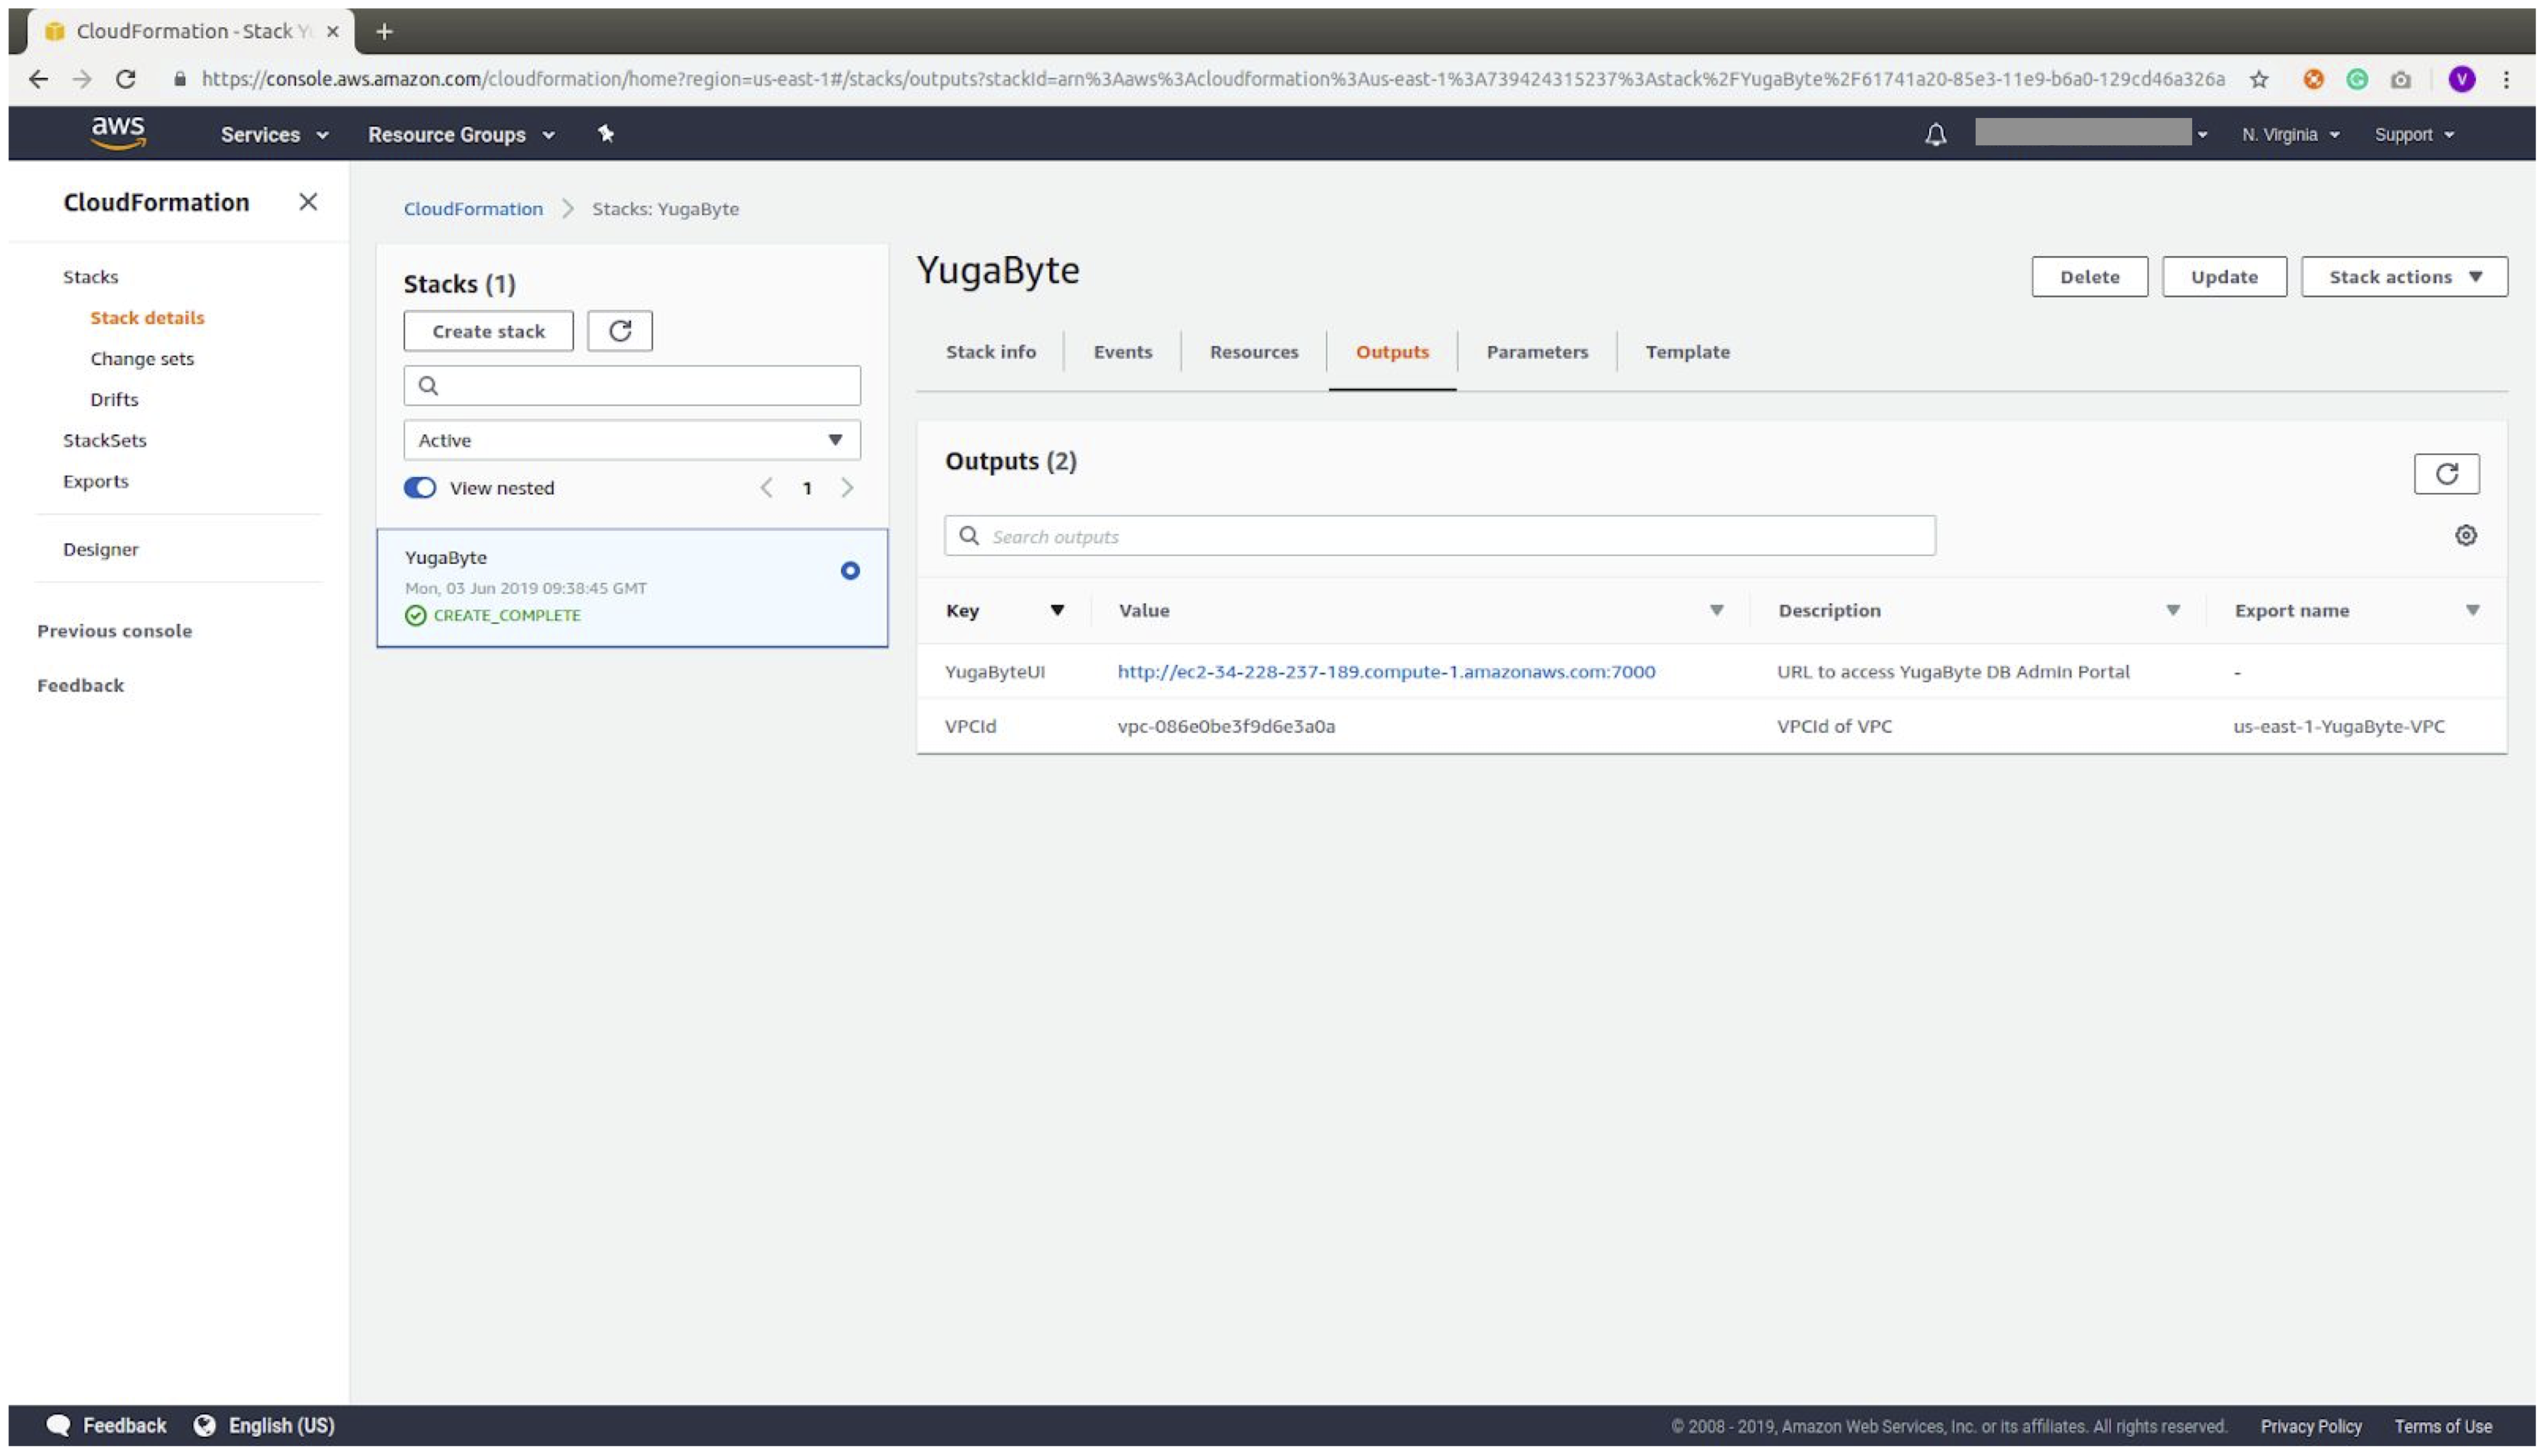
From this output, you can get the VPC ID and YugabyteDB Admin URL.
Because the stack creates a security group that restricts access to the database, you might need to update the security group inbound rules if you have trouble connecting to the DB.
## AWS Console
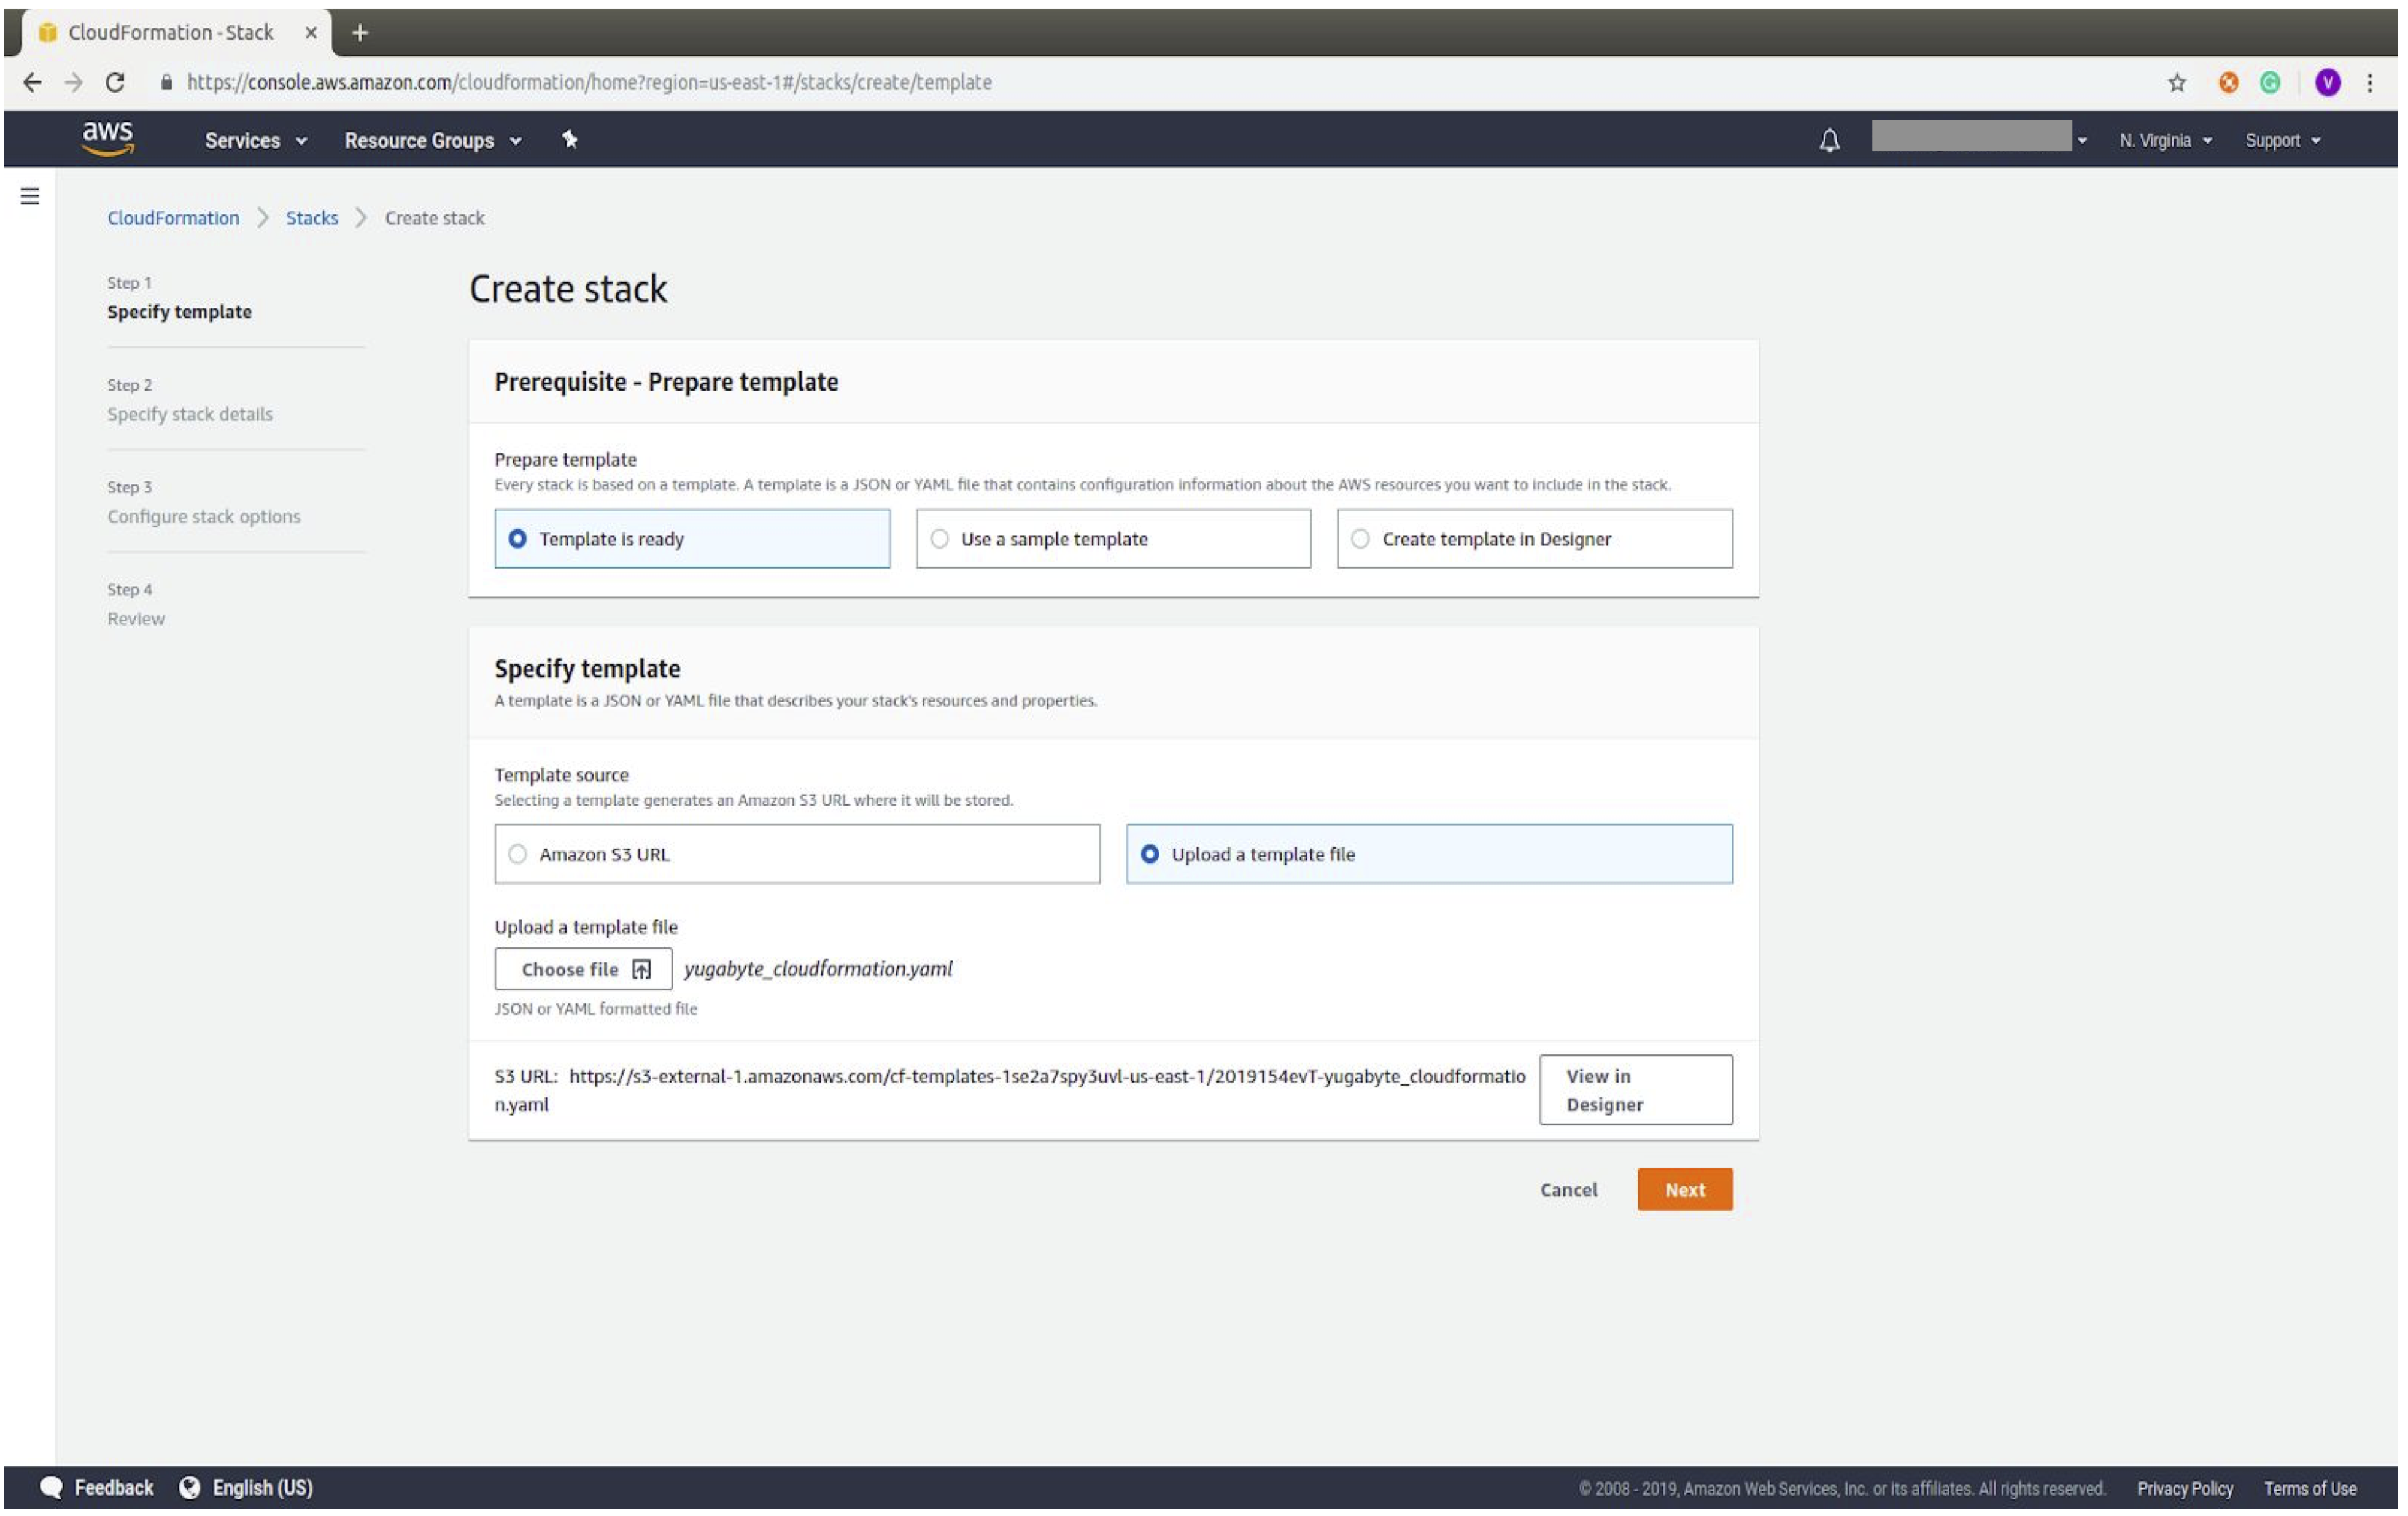
1. Navigate to your AWS console and open the CloudFormation dashboard. Click **Create Stack**.
2. Prepare a template using the downloaded template.
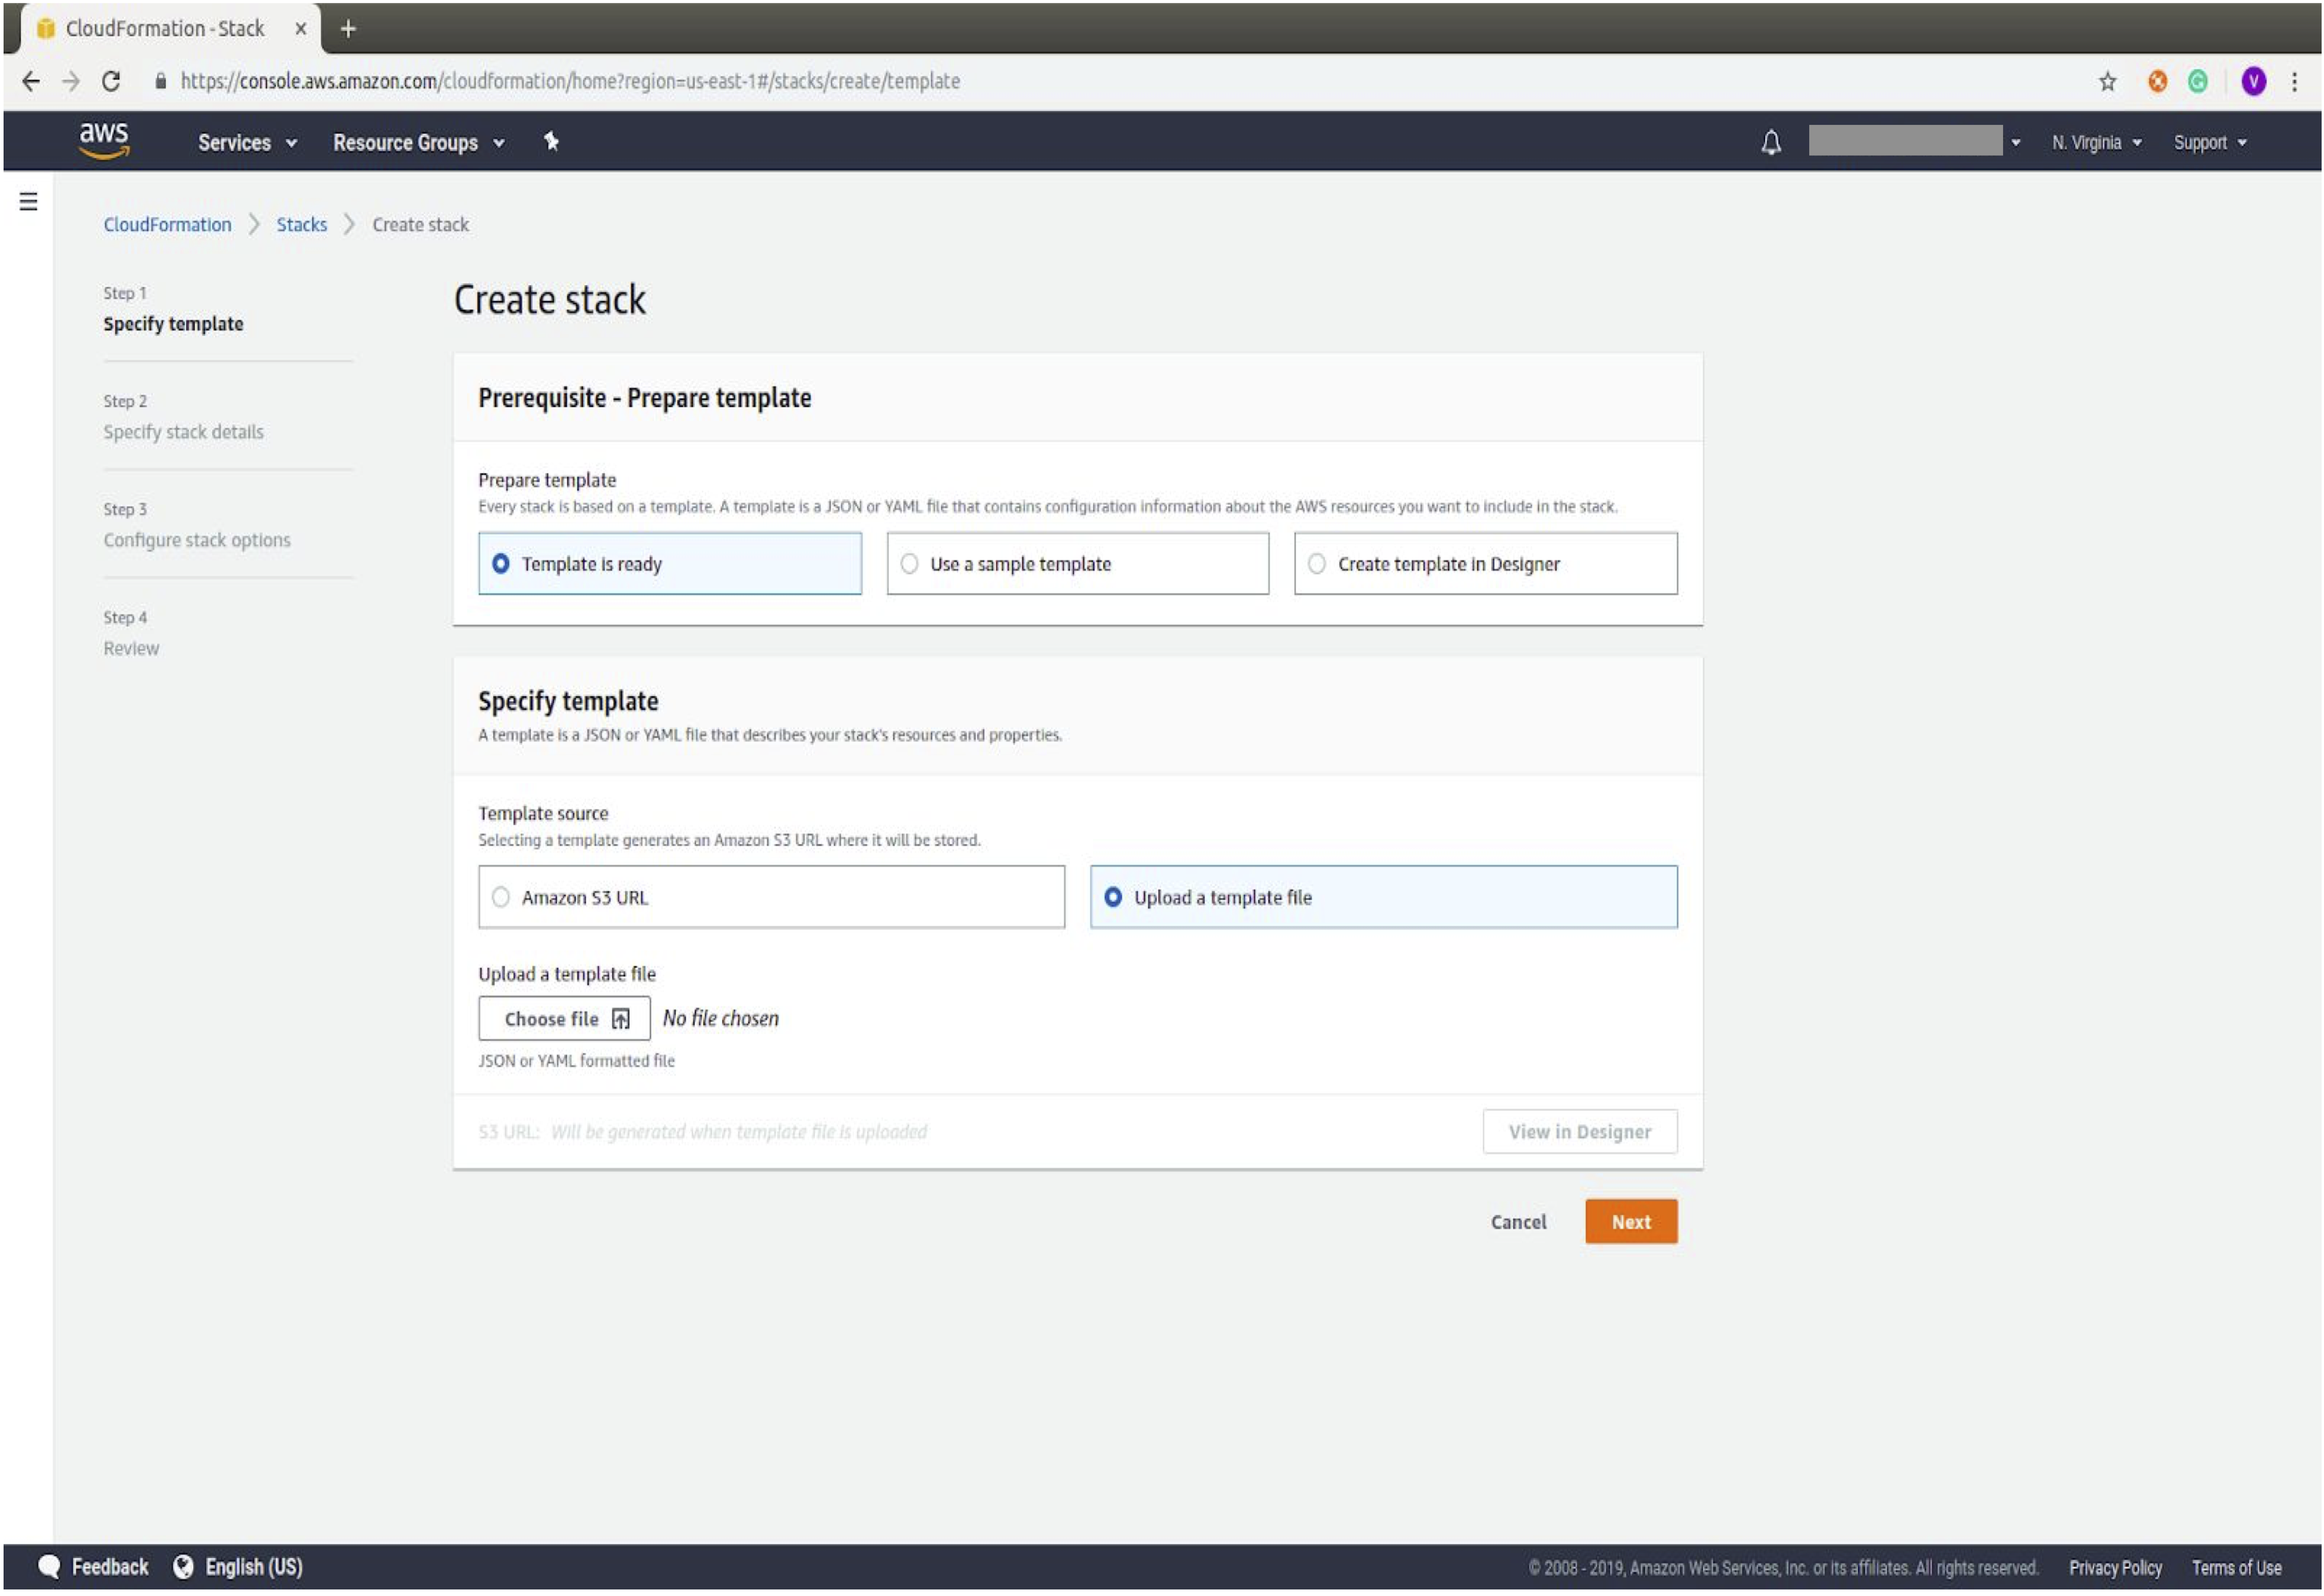
3. Specify the template file downloaded in Prerequisites: `yugabyte_cloudformation.yaml`
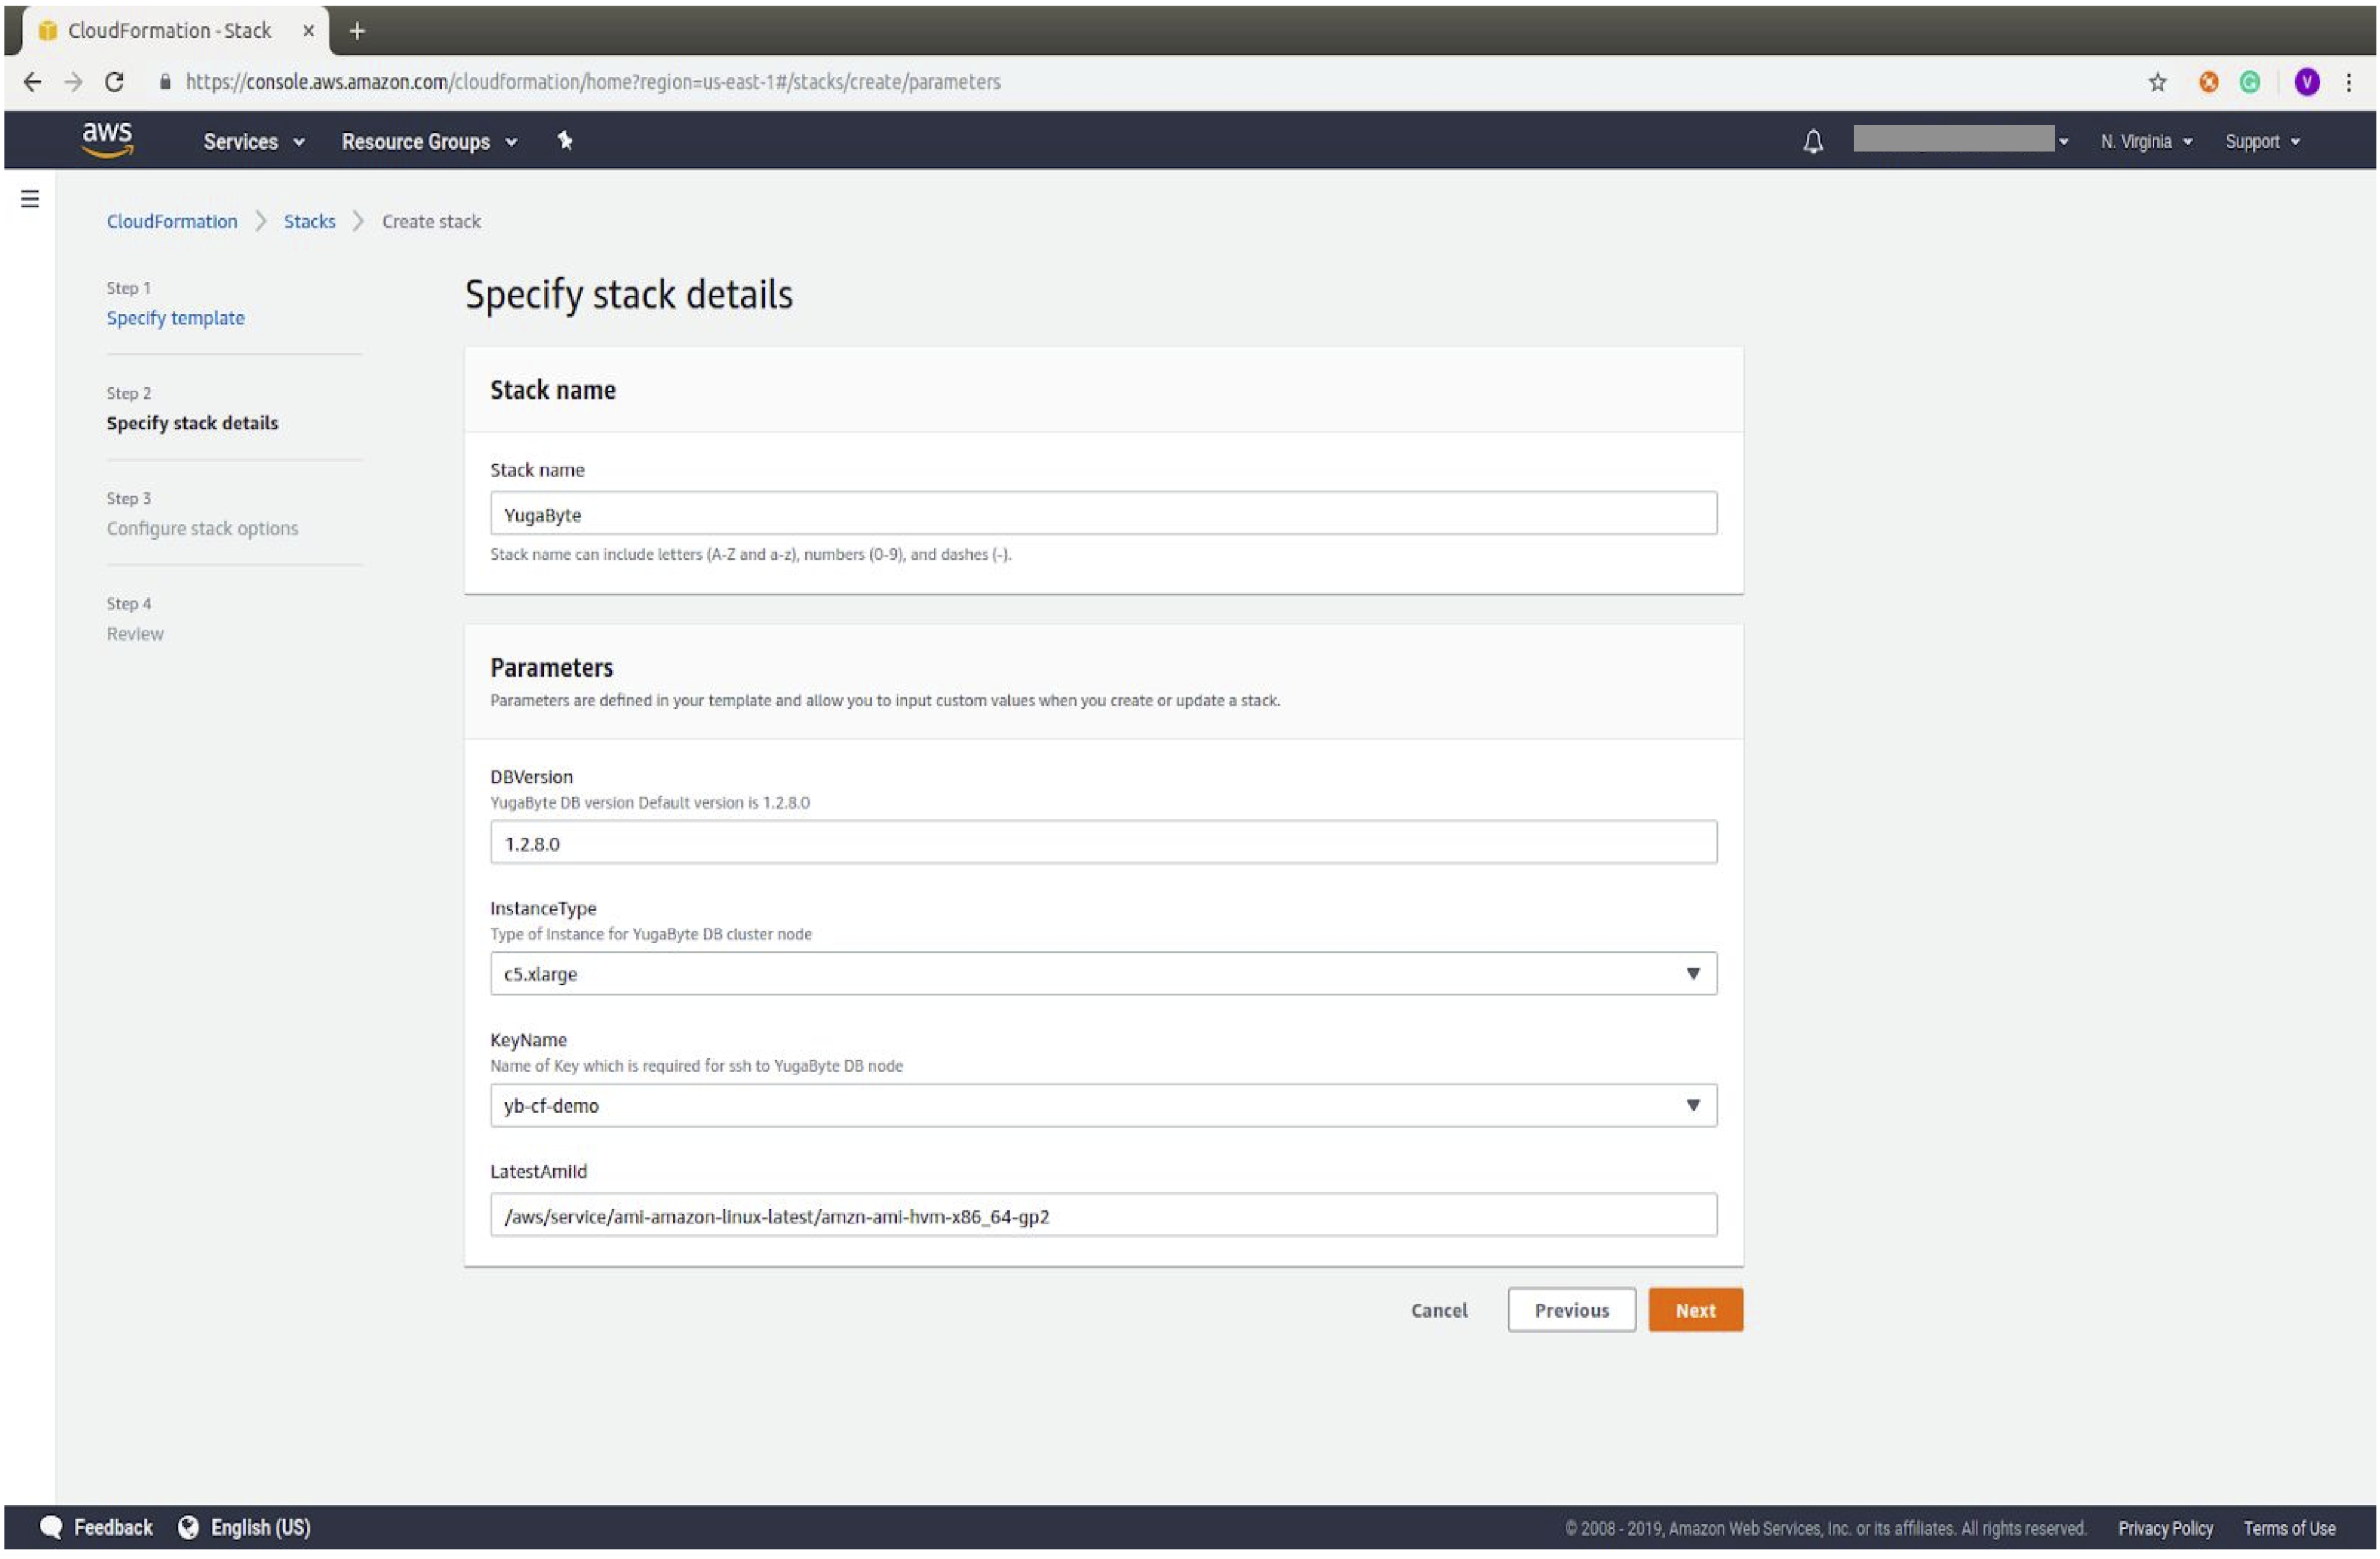
4. Provide the required parameters. Each of these fields is prefilled with information from the configuration YAML file that was uploaded. `LatestAmiId` refers to the ID of the machine image to use, see [Find a Linux AMI](https://docs.aws.amazon.com/AWSEC2/latest/UserGuide/finding-an-ami.html).
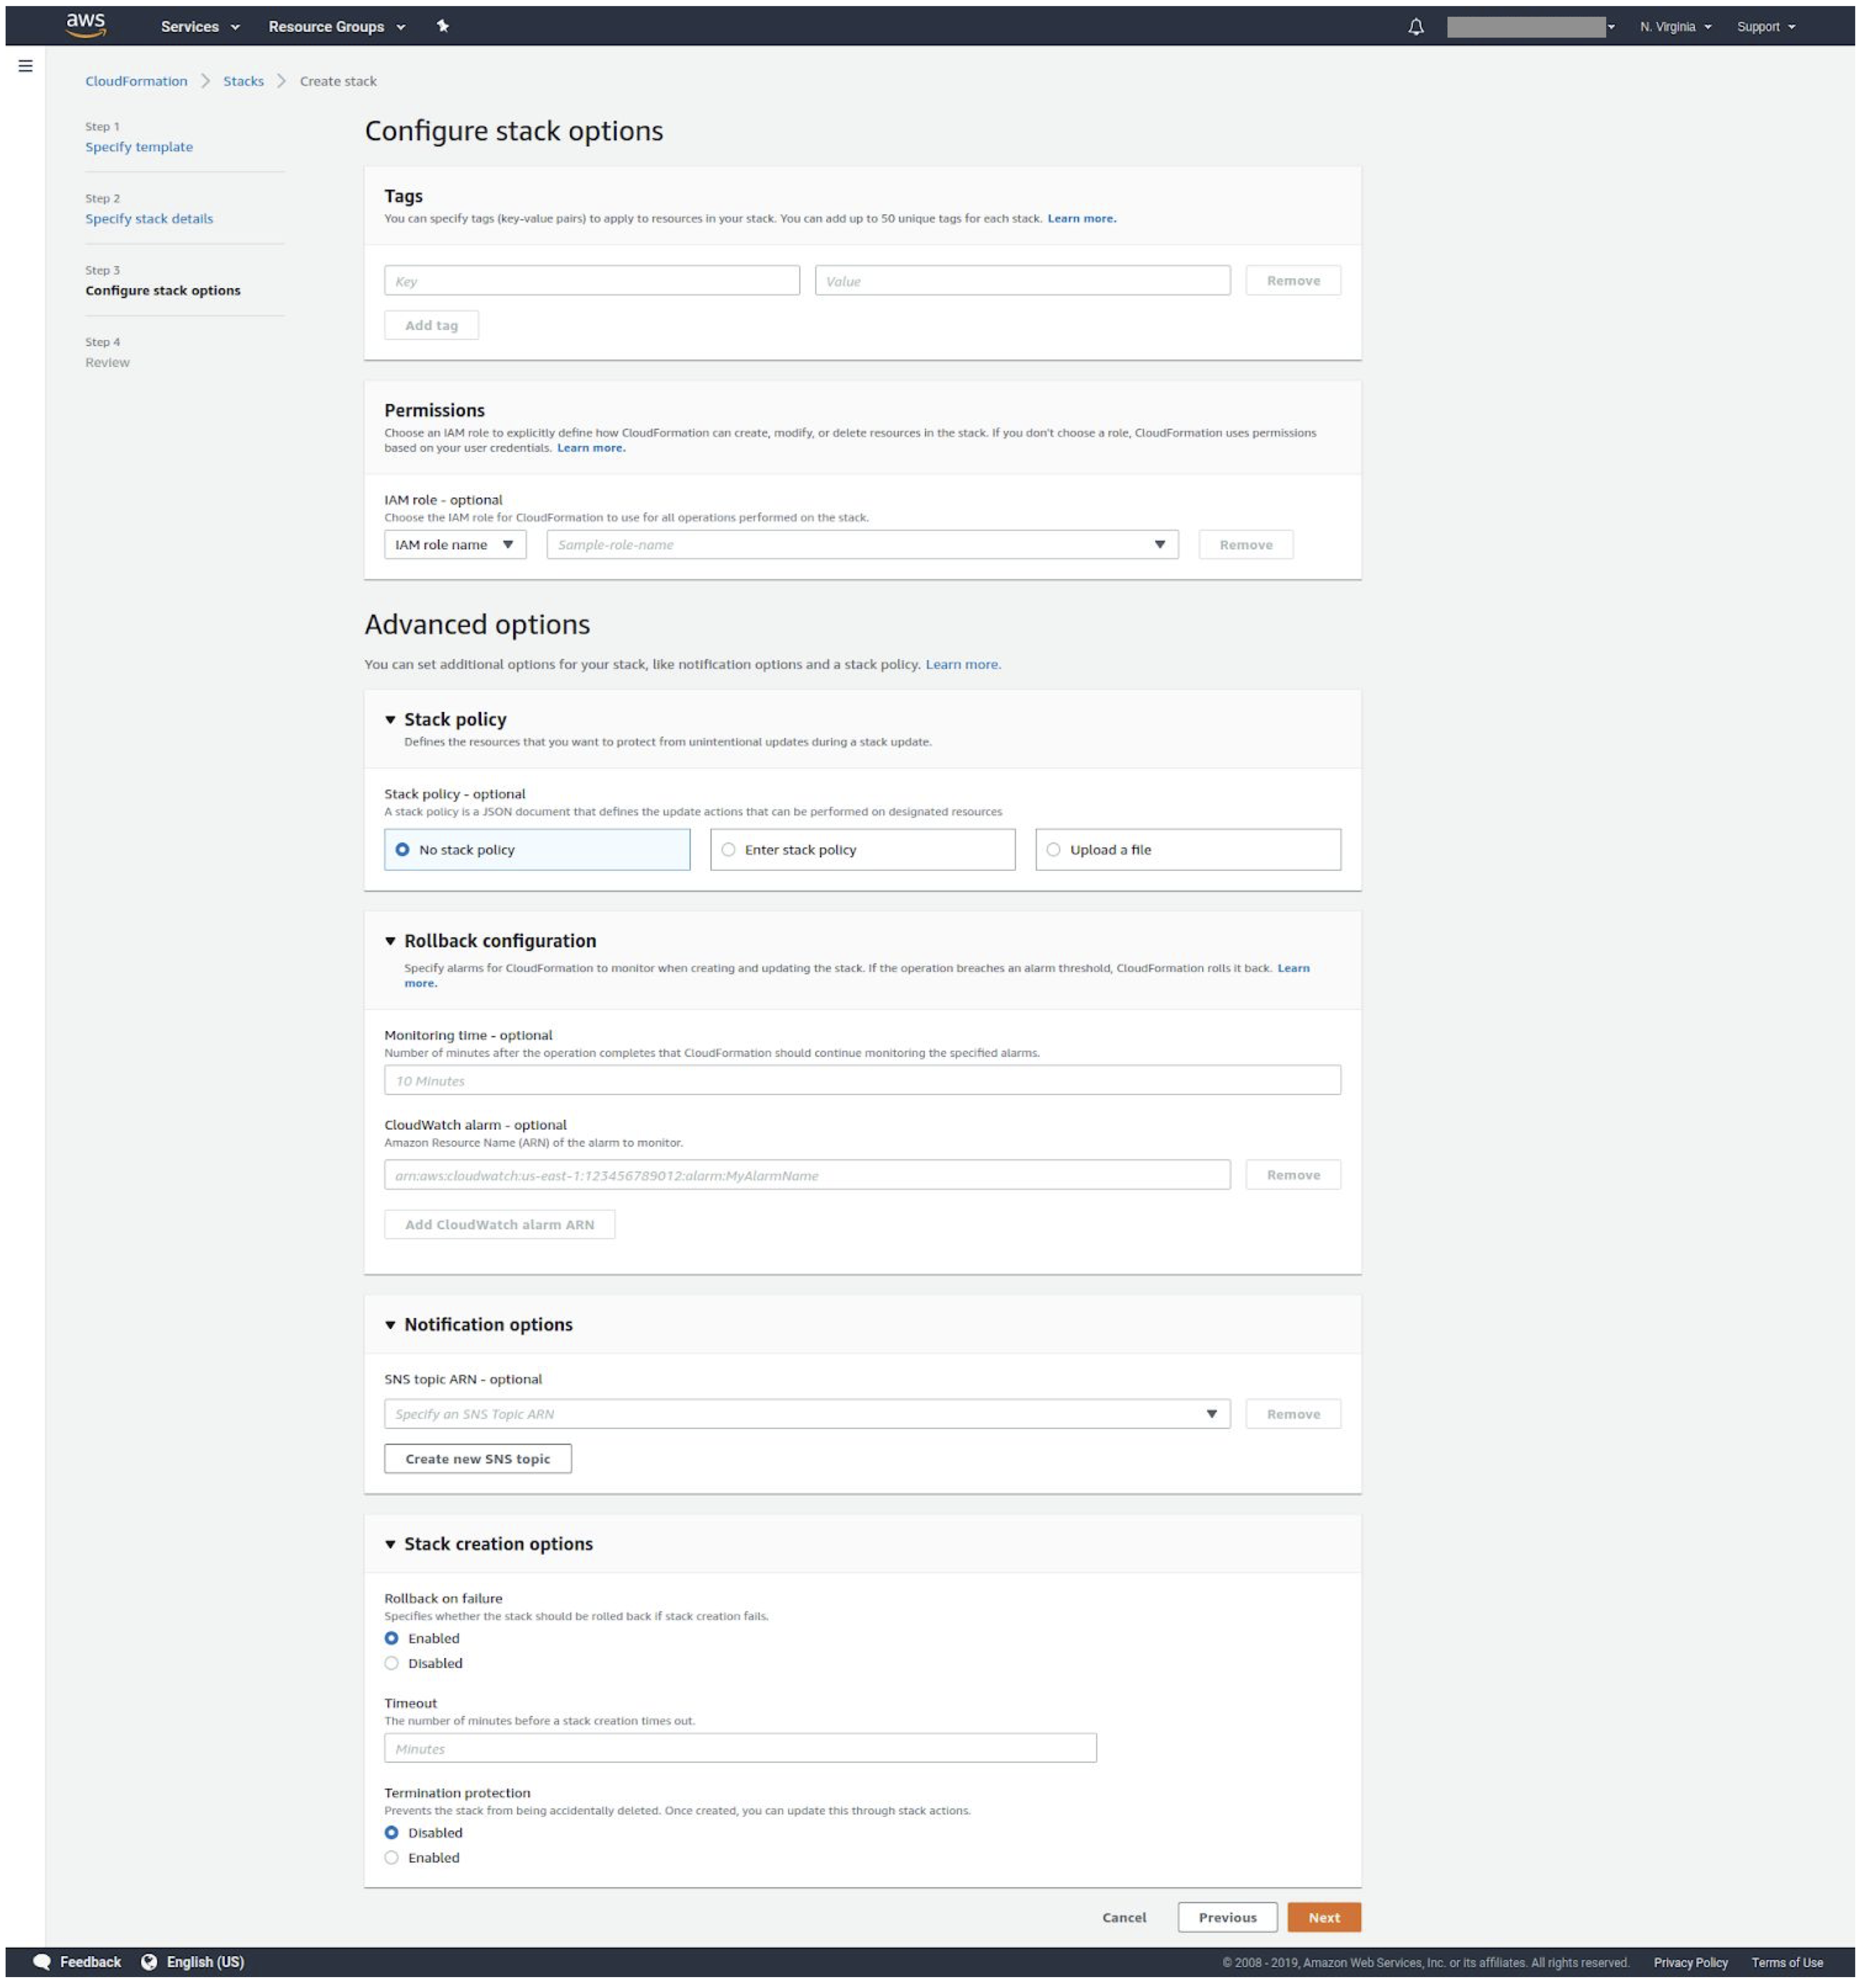
5. Configure stack options. For more information, see [Setting AWS CloudFormation stack options](https://docs.aws.amazon.com/AWSCloudFormation/latest/UserGuide/cfn-console-add-tags.html).
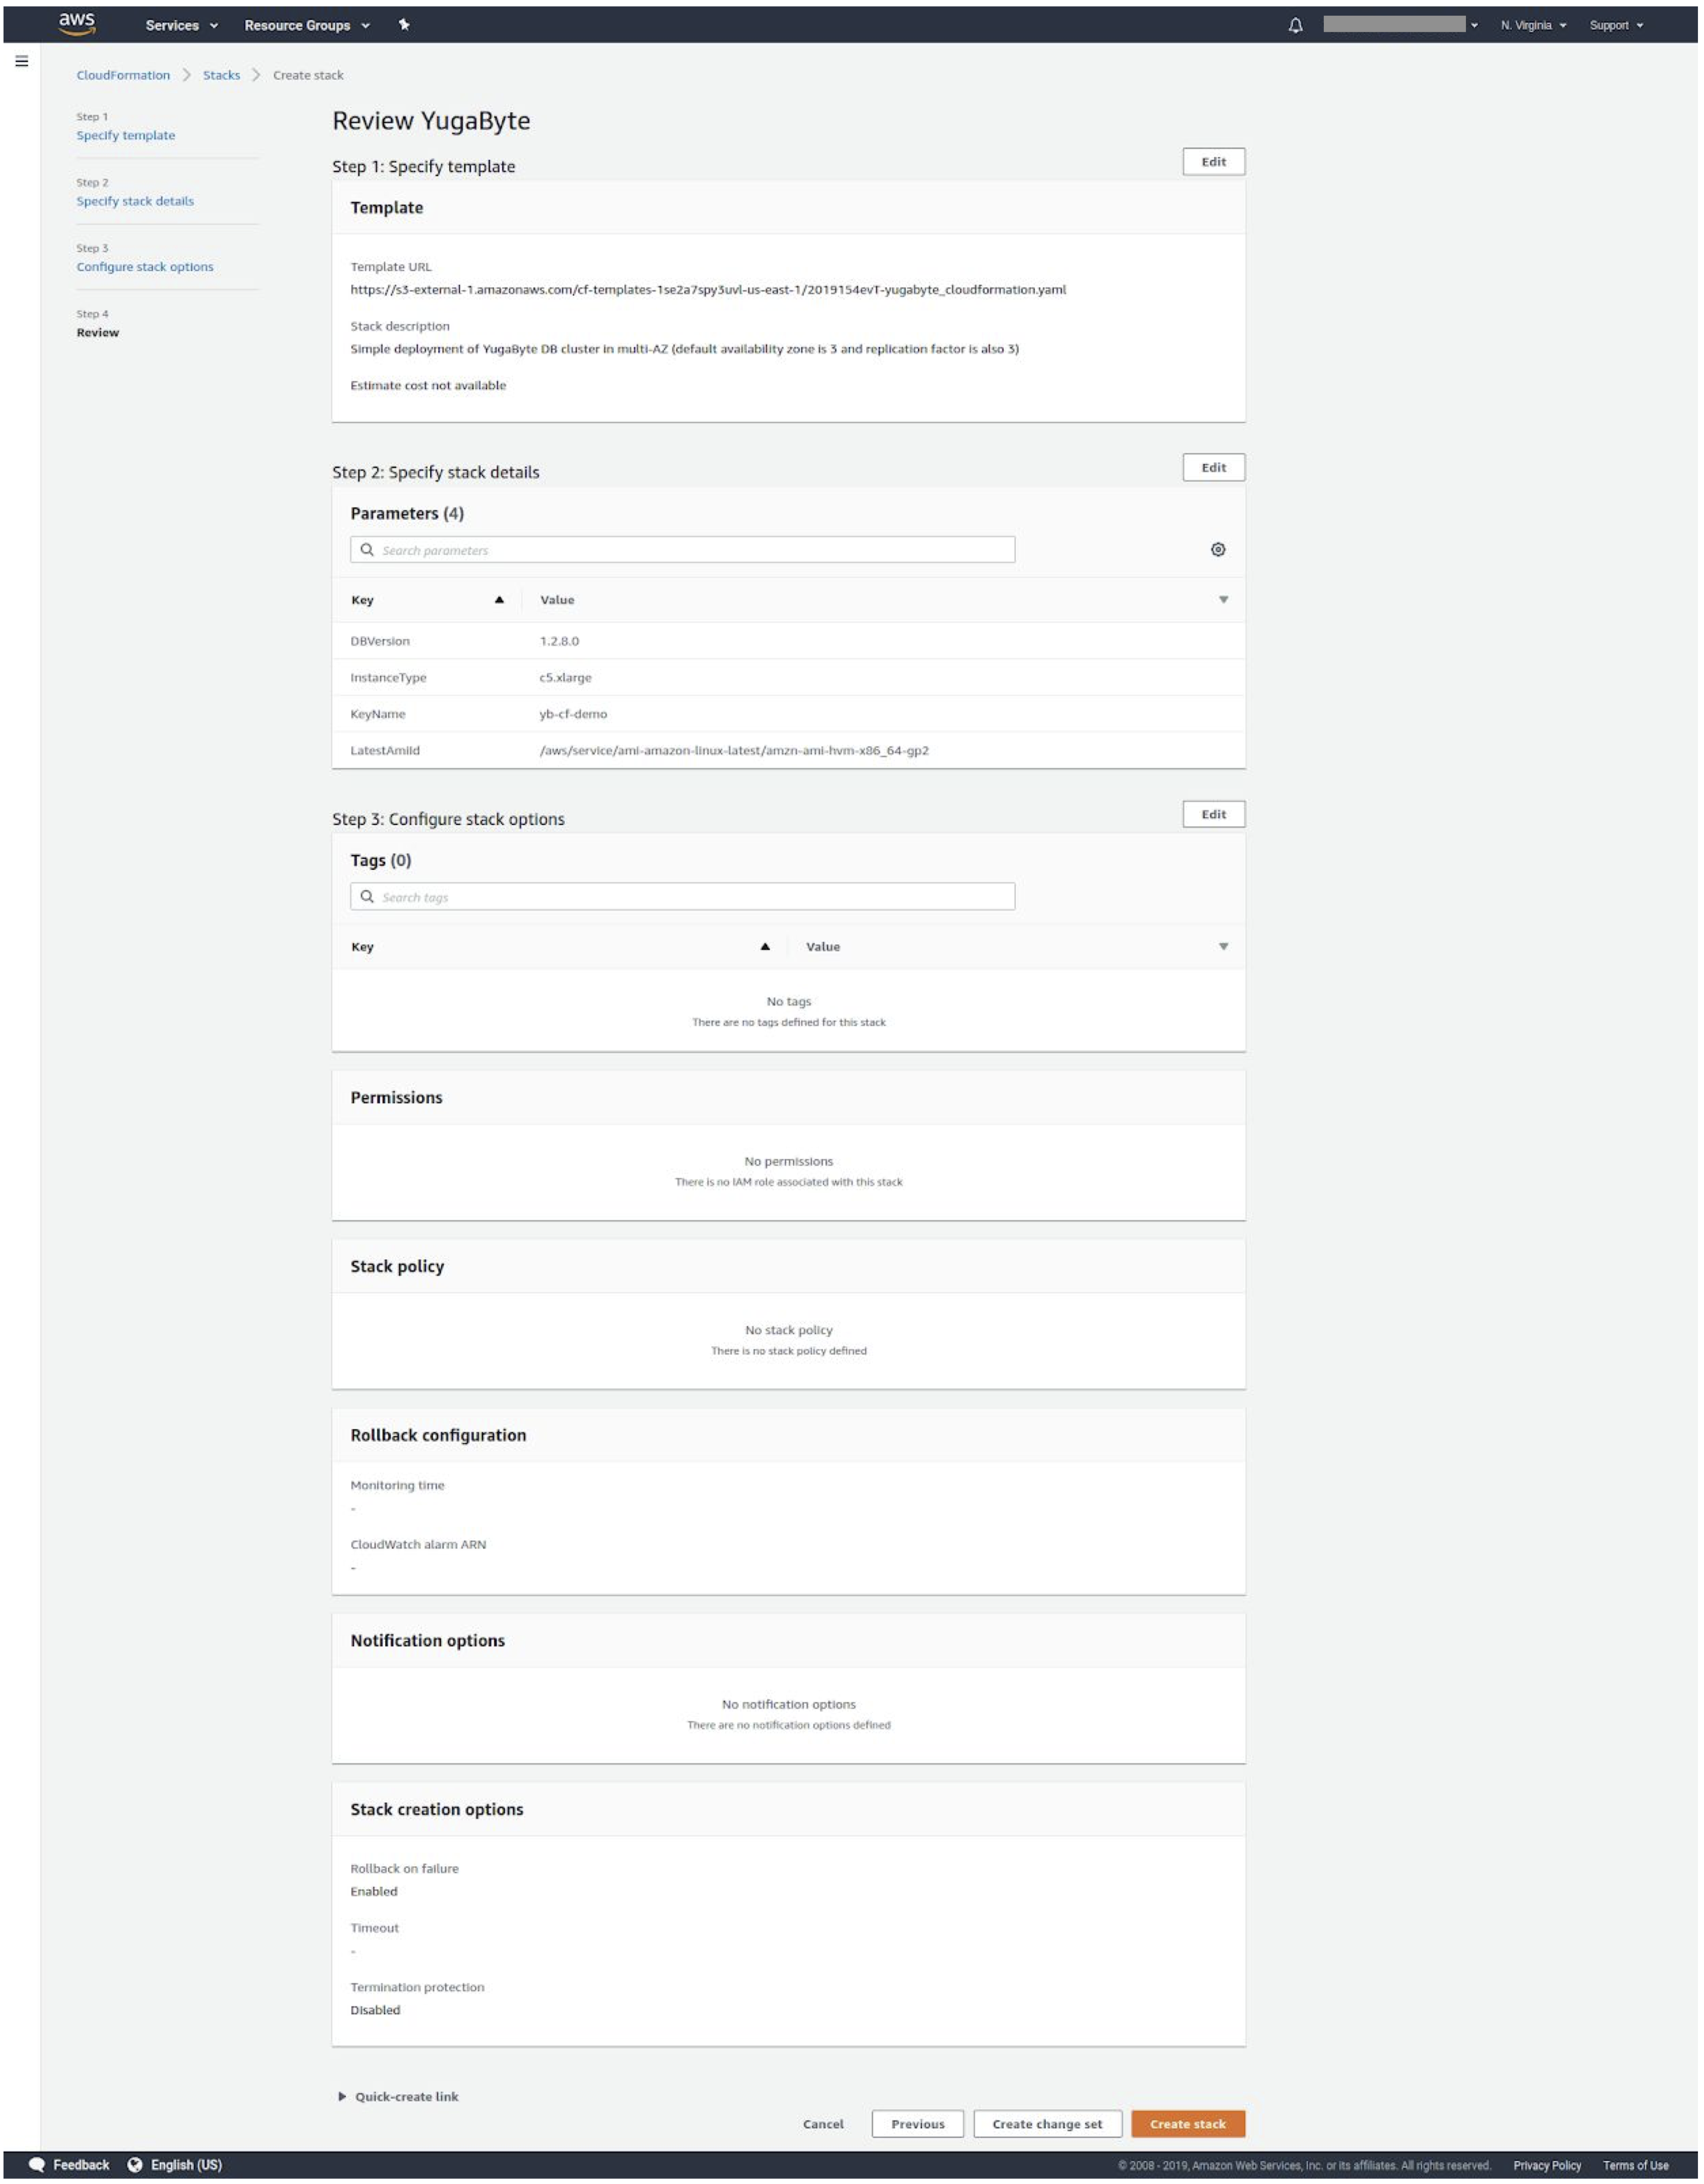
6. Finalize changes before creation.
7. Check stack output in the dashboard.